Tuesday, March 25, 2014

A Birthday Card

G'Day

A special lady is turning 50 on 23rd March and Shirley is hosting a virtual party for the month of March.

So come and join in and wish Maria (rieslingmama) a Design Team member from STAMPlorations a happy Birthday at Shirley Bees Stamping Stuff Blog.

Here is my Birthday Card for Maria.

HAPPY BIRTHDAY MARIA. You are fabulous artist, congratulations on your life achievements and many more in your future.

I used water color pencils, for a subtle colour on an embossed background. With a simple and elegant sentiment surrounded by flowers for some bling.

I would like to link this card to CAS(e) this Sketch #69 which was my inspiration for the layout of this card. Also The Card Concept challenge #6


Come and join the party at Shirley's... And wish Maria a Happy Birthday with your fabulous cards.


Cheers MoniKa


Saturday, March 22, 2014

Just a Note to Say

G'day

Feeling good this morning so I decided to make another simple card, using my new feather stamps from STAMPloarations.

Here is a picture.


This is the inside with glitter on the butterflies.


A bit of close up and angle to show dimension and glitter on butterflies.


I used the following distress inks by Tim Holtz (shaded lilac and broken china), memento (teal zeal).

The stamps used are by STAMPlorations (vignette - trendy feathers, artiful butterflies, patchwork frenzy - graphic pentagons) and KaiserCraft - humming bird.

Simple card to make using water color paper, I stamped the feathers in broken china and the butterflies in shaded lilac, I stamped off once to achieve a lighter look background, I then used water brush to get a soft blue on the images.

I wanted the main images to stand out so I used teal zeal and stamped three butterflies and three feathers for the main images.

I then punched out three small butterflies with light blue textured paper.  I used crayola silver glitter glue on all the butterflies.   I like a bit of dimension on my card.
Then I used my favorite designer Victorian style scissors and cut around.  I finally sponged with broken china the edges.

Glued the design paper onto a darker blue textured paper and stuck it on the base card.   Stamped a couple of sentiments in teal zeal.   Which I think go well together and followed it by inspirational words on the inside.


Hope you like my card....

I would like to enter my card in the following challenges :-

Simon Says Stamp - Glitter it (Wednesday challenge blog)


cheers MoniKa


Friday, March 21, 2014

A Crackle of a Card

G'Day

I just love making my own crackle paint, so easy, check out my post on how to make homemade crackle paint.

I created crackle paint on black paper using distress paints (dusty concord, wild honey, broken china and peeled paint). I find them easier to paint with, they seem to be smoother then acrylic paint.

I just love distress paints by Tim Holtz. I reckon they are so cool I am slowly building up the whole collection of colors. I have so far, broken china, barn door, peeled paint, wild honey and dusty concord.

I cut the dried crackle paint to size and made small banners out of them.
I then stamped a sentiment (STAMPlorations vignette - trendy feathers) in versamark watermark ink and heat set it with Zing silver embossing powder on black paper and cutting out.

I wanted to make a simple card (CAS).

Here are pictures. clik for detail of the crackle paint.


I was not sure what to do with the fourth banner, three is always good number, so I decided on a flower, always makes a simple statement. The banner looked like a vase, cool. I was not sure about the stem, thus left it at that.
Accompany the sentiment, on the front, Just a Note, i wanted inspiring words on the inside, so I stamped words from STAMPlorations artiful flutters.
That's it, a simple card....cool...
 
I would like to enter the following challenges :-
 
Divas by Design - Flower Power
Scribble and Scrap - always anything goes
CAS on Sundays - challenge #29 One Layer Wonder
Stamlegarten Challenge - challenge #23 one layer card
 
See ya soon...Monika


A Bit of Vintage

G'day

Thought I would do a bit of water coloring using vintage style look with feathers and butterflies.

I created the background on water colored paper and stamped images from STAMPloarations (vignette: trendy feathers, aritiful flutters and electric floarls).

Before I stamped the images I stamped an Asian script all over the page, somehow slightly disappeared during following processes.

I used distress inks by Tim Holtz (walnut stain, brushed corduroy, faded jeans, forest moss) for stamping images and then using water to color them in.  I wanted to achieve that dark old look.  I then water brushed with faded jeans in between the images to fill in white spots.

Once dried I crumpled the water color design paper to make look old and cut the edges with Victorian style design scissors.

clik photo for details


I created a background for the design to sit on.  I just discovered how to create my own homemade crackle paint and decided to go with the greens and blues (distress paints), in the pic it looks a bit brighter then real life.
Apologies for the unfocused picture.  Love how the crackle turned out.  Each time I make one it turns out different, but I like this one, has bigger cracks.


Not sure what to do next, I wanted to have some kind of script or something, so I went through my stash of designer paper and glued the pair onto that.


I found some nice sayings from a design paper pack.  Above picture playing around with placements.

The final outcome....thought too big for a card so i pasted it on a piece of flat canvas.


I wish I did a better job on cutting straight, I am one of those that does not cut very straight.  I eventually bought a guillotine, much better.  But using designer scissor thats another story.....I do my best.


Anyways I thought I would share....I really like how the background with feathers and butterflies turned out....should have done something else with it...i think too many layers with frames...should have simplified it a bit....no worries all looks good in real life.


I would like to enter this panel in the following challenges:-

STAMPlorations - bi weekly sketch #8 challenge


THnaks for stopping by....stay tuned...I stilll have a panel project to share and another card I have made today.


seeya MoniKa

Thursday, March 20, 2014

More Watercolouring..Just Fab

G'Day

I just love water colouring stamped images with distress inks by Tim Holtz..

I made a similar background as the card on the previous post, just loving butterflies at the moment.

Here is the card

This is the inside of the card


I used water colour paper, smooth side and inked up the following stamps. STAMPlorations (artiful flutters, thankful grateful - leaf, electric florals, it's all about you). KaiserCraft (bonjour - butterfly). Rubber stamps (flowers).

using distress inks (wild honey, dusty concord, spiced marmalade, crushed olive, shaded lilac, scattered straw, dried marigold, faded jeans) and memento (sweet plum) for the swirls.

I used water colour brush and coloured it all in with water, including the surrounding white areas. I stamped the sentiments glued them on design paper and again on single design paper. I put you are on pop dots to make stand out. The rest of sentiments on banners and glued on single colour design paper.

I put the completed design on single coloured blue design paper then onto base card adding dots with white gel pen to enclose the whole design.

For some bling I added some pearls to the flowers and an extra flower for some dimension.

It does look bright for a background, I should try one with lighter shaded, stamping off the image first.....

I keep thinking it is too much happening in this card....don't know! Self doubt..yuky....do you get moments like that, share your thoughts, if you like.


I would like to enter my card in the following challenges.

STAMPlorations - biweekly sketch sketch #8 challenge

STAMPlorations - monthly challenge March - spring and stamps

Scribble and Scrap - always anything goes

That Craft Place - flowers


That's is all for now....I have another project on canvas to share...stay tuned....


Cya for Now. MONika.


Saturday, March 15, 2014

Feels like Spring

G'day

Feels like Spring wherever you are.  I got inspired by a couple challenges that mention Spring is in the air or close by....so here is my card.


Inside of the card I stamped some butterflies and flowers in matching colors from the front, just to add some color.


I used water colour paper and stamped with distress inks (wild honey, red barn, crushed olive and faded jeans) butterflies and flowers (stamplorations artiful flutters, electric florals) and leaves (fiskars road trip).  Let them dry for a few minutes, I then used a water coloring brush and went over the butterflies, flowers and leaves to give them a subtle water look.   That is my background for spring, happy colors and new life.

I then cut a strip of water color paper and put some distress inks (red barn, wild honey, faded jeans, dusty concord) on my craft sheet and made a strip of color as you see for the background of my banner for the word Spring (foam letters that stick on), then I spritzed with water and dabed with paper towel, you can see the water splotches, cool.   I then cut a background design paper for the banner (creative pl vintage paper).  Then i placed the banner with pop dots onto the background.


I wanted to add some dimension so I paper punched out some butterflies, dragonfly and leave with the work ahhhh, for the delightful Spring on its way. I also added silver glitter glue to give some bling on the card, and a pretty yellow flower for that extra touch.


I really enjoyed making this card.   I found a cool way of water coloring images, stamping with distress inks first, let dry a bit, then use water color brush and start coloring in the images.  I like the soft water color effect.


I would like to enter my card in the following challenges :-

STAMPloarations - Monthly Challenge - March Stamps and Spring

Addicted to Stamps and More! - challenge #86 - Anything Goes

Crafting by Designs - Things with Wings (2nd entry)

Crafting for all Seasons - Spring into Spring

Love to Create - challenge #106 Anything Goes

Make my Monday - Spring

The Crafters Cafe - challenge #54 Flowers


Thanks for Stopping By - Enjoy your Spring where ever you are in this beautiful and wonderful world of ours.

See ya soon MONika

Wednesday, March 12, 2014

Another Butterfly Card

G'Day

Felt like making another card the other day based on the sketch at CAS(e) This Sketch..I seem to be hooked on pretty butterflies recently hmmm....

Here is my card..

On the below card I was playing with the tones of photos on my iphone5.


I used a couple of craft tags, that's why they are a bit darker toned, in real life they the card is much more darker vintage toned.

I stamped the flower (STAMPlorations simple flowers and sentiments) and water coloured it with distress inks (dusty concord, wild honey, green olive, walnut stain)..I used golden glitter glue for the leaves and butterfly.

The butterfly (STAMPlorations artiful flutters) I stamped on tag with dusty concord and again to watercolour it with distress paint (barn door, wild honey) fussy cut for dimensional look. I also cut around tag with my pretty design of vintage style scissors.

I stamped the sentiment (Fiskars home sweet home) in (ColourBox wicked black) and the wavy border (STAMPlorations patchwork frenzy) in dusty concord. The last thing was to sponge the edges with dusty concord.

For the card base a glued on design paper with script by KaiserCraft vintage timeless and sponged the edges with distress ink dusty concord.

I then glued on the tag with sentiment onto the card base then the focal image tag with pop dots onto that tag for a bit of dimension. I also added a stick on pearl in the hole of the main tag for a bit bling..


Cool...me happy..just love using tags, I wish I had Manila tags instead of craft tags, I think the colours would be more vibrant, but I love craft tags tool....

Apologies for so many pictures trying to show the true colours in real life, the closest was the first two photos.


I like to enter my card in the following challenges.

Crafting by Designs - Things with Wings

Crafting by Designs - Anything goes March (2nd entry)

Virginias View Challege - # 1 watercolouring

Craftyhazelnuts Patterened Paper Challege Blog - March Challenge (2nd entry)

CAS(e) This Sketch - sketch #67


Hmmm still thinking about a Spring themed project, I see there are a few challenges with this theme...Thinking more butterflies, flowers, colourfull background...maybe another simple card....


See ya for now....MoNika


Monday, March 10, 2014

Homemade Crackle Paint

G'day

Been checking out homemade crackle paint on YouTube, cool, all it takes is glue and paint, who would have thought twas so easy.....so guess what, I had to try it straight away, like last night.

Here is pictures.

This is the first one I tried.  Using a paint brush I applied glue (mod podge matt) one layer, let dry to tacky, then apply with brush paint (distress paint broken china).  Then let it dry completely to see the effect of the crackle, but I could not wait so I used my heat gun to dry and that is the result.  Small linear cracks, very cool, so small detail like on wooden letters.  I used a craft tag no underlying color.

clik on pic for detail

This is the second attempt, I was just not getting the bigger cracks that the ladies show on YouTube.   I saw one lady using her finger to spread the glue and paint.
So I tried that and is the result below.  The tag on the right is the first one I did, pretty good, I used glue (mod podge) and then distress paint dusty concord, straight onto a craft tag.  The tag on the left I painted on distress paint wild honey, then the glue then distress paint dusty concord (I left this one dry over night, twas late). I applied a bit more glue.

clik on pic for detail

Not bad, but I would like the cracks to be like cracks, not so much linear...any ideas...please do share in comments on this post.....
 
This is what I used :-


I tried normal acrylic paint but found this distress paint lot smoother.


Here is couple of YouTube videos I located for making your own crackle pain.

How to make crackle paint by scrappinstampers (wow, this one is cool)

Make your own crackle paint by papio (good tutorial, compares two ways)


Very cool, I like the first method I tried, small crackles for fine detail, have to try on a card or tag project.

Any tips or techniques how to improve the crackle is more then welcome, please post in comments on this post.


Cool, yesterday I learnt two things to make crafting more exciting and cheaper, how to make homemade texture paste and crackle paint....hmmmm.....what is next....yesterday thinking about making my own tomato sauce.....I know how to make my own from scratch custard, white sauce and recently ice cream......YouTube here I come....


seeya for now
MOnIka

Homemade Texture Paste

G'day

Yesterday I was surfing the YouTube, as always, for ideas on how to make homemade texture paste.  Here are a couple that I found.

DIY - Make Your Own Texture Paste by gauchealchemy

Tutorial using homemade texture paste and a blog how to make the paste. By Gabrielle Pollacco.


Well I am thinking I have all the ingredients at home except talcum powder.  I wonder if I could use white flour but sifted, that would roughly have the same consistency as the talcum powder.   Does not hurt to try.

So I used Gauch Alchemy recipe, just roughly measuring the ingredients.

Not bad, has a good thick consistency, spreads well and has some texture bits in it too, just waiting for the samples to dry.   Once dried I will try to add some color over.    I covered the paste and hope it will not dry out.

 Here is a couple of pictures.


I used :-
White acrylic paint
Liquid glue (mod podge matt)
Plain flour (sifted)

I did not measure exactly, just roughly 1 part paint, 1 part flour and 1/2 part glue

I mixed it all together in a plastic container just in case it did not work out.

Got some paper, circle stencil and a spatula, globed on some paste and spread, mind you I have never done this before and by looks of it I need practice on spread out the paste over the stencil.

Anyways looking at some YouTube samples where texture and embossing paste was used and wow, I will share the links for ya.

Mixed Media Earth Tag by contadinaK

Steampunk Mixed Media Journal Cover by Gabrielle Pollaco

Card making with Embossing Paste and Stencils by Sara (with glitter too)

Embossing Paste Technique by AKCaraboo

Couple of hours later I checked on the paste sample and it has dried and is all texture, very cool.  I tried inking with distress ink, distress paint and pretty good.  Looks like the left over past in container is still wet, thus might not dry out when there is a lid.    Next I will try to add color to the actual paste and spread.

Here is couple of pictures when dried.


 I definitely need practice on spreading the paste.   Any techniques and tips are welcome, please comment on this post, that would be great.


Well thats about it.   Looks good homemade texture paste. Now to think about the projects I can make with this, I do few stencils hmmmm the possibilites.


See ya for now......checking out homemade crackle paint on YouTube....

cheers MOnika

Friday, March 7, 2014

A New Card for a New Beginning

G'Day
Been a while. I am sure some of you at a point in time have been through a Crafters Block. Well this fiesta of a time away from creating cards, tags and canvas, has obtained a fresh and clear mind....as a quote saying "too much of one good thing is never good" or something like that.

I think I have gotten my mojo back, after about a month, hanks to my hubby and youtube. Two of the best in my life. I let out my fustration or whatever crafters block I was going through to my hubby and he understood and pointed me in the right direction. Then I was trying to get inspired by youtube video clips showing how to make layouts for anything really and bam!! Just this one made my day, it bought me back to reality and the way I love to create cards, tags and canvas.

Now before I show you what I created on a flat panel canvas, I would like to share a basic card I have made, keeping in mind couple of challenges that I would like to enter.

I have lots of design paper, which I really love and wanted to use for so long.

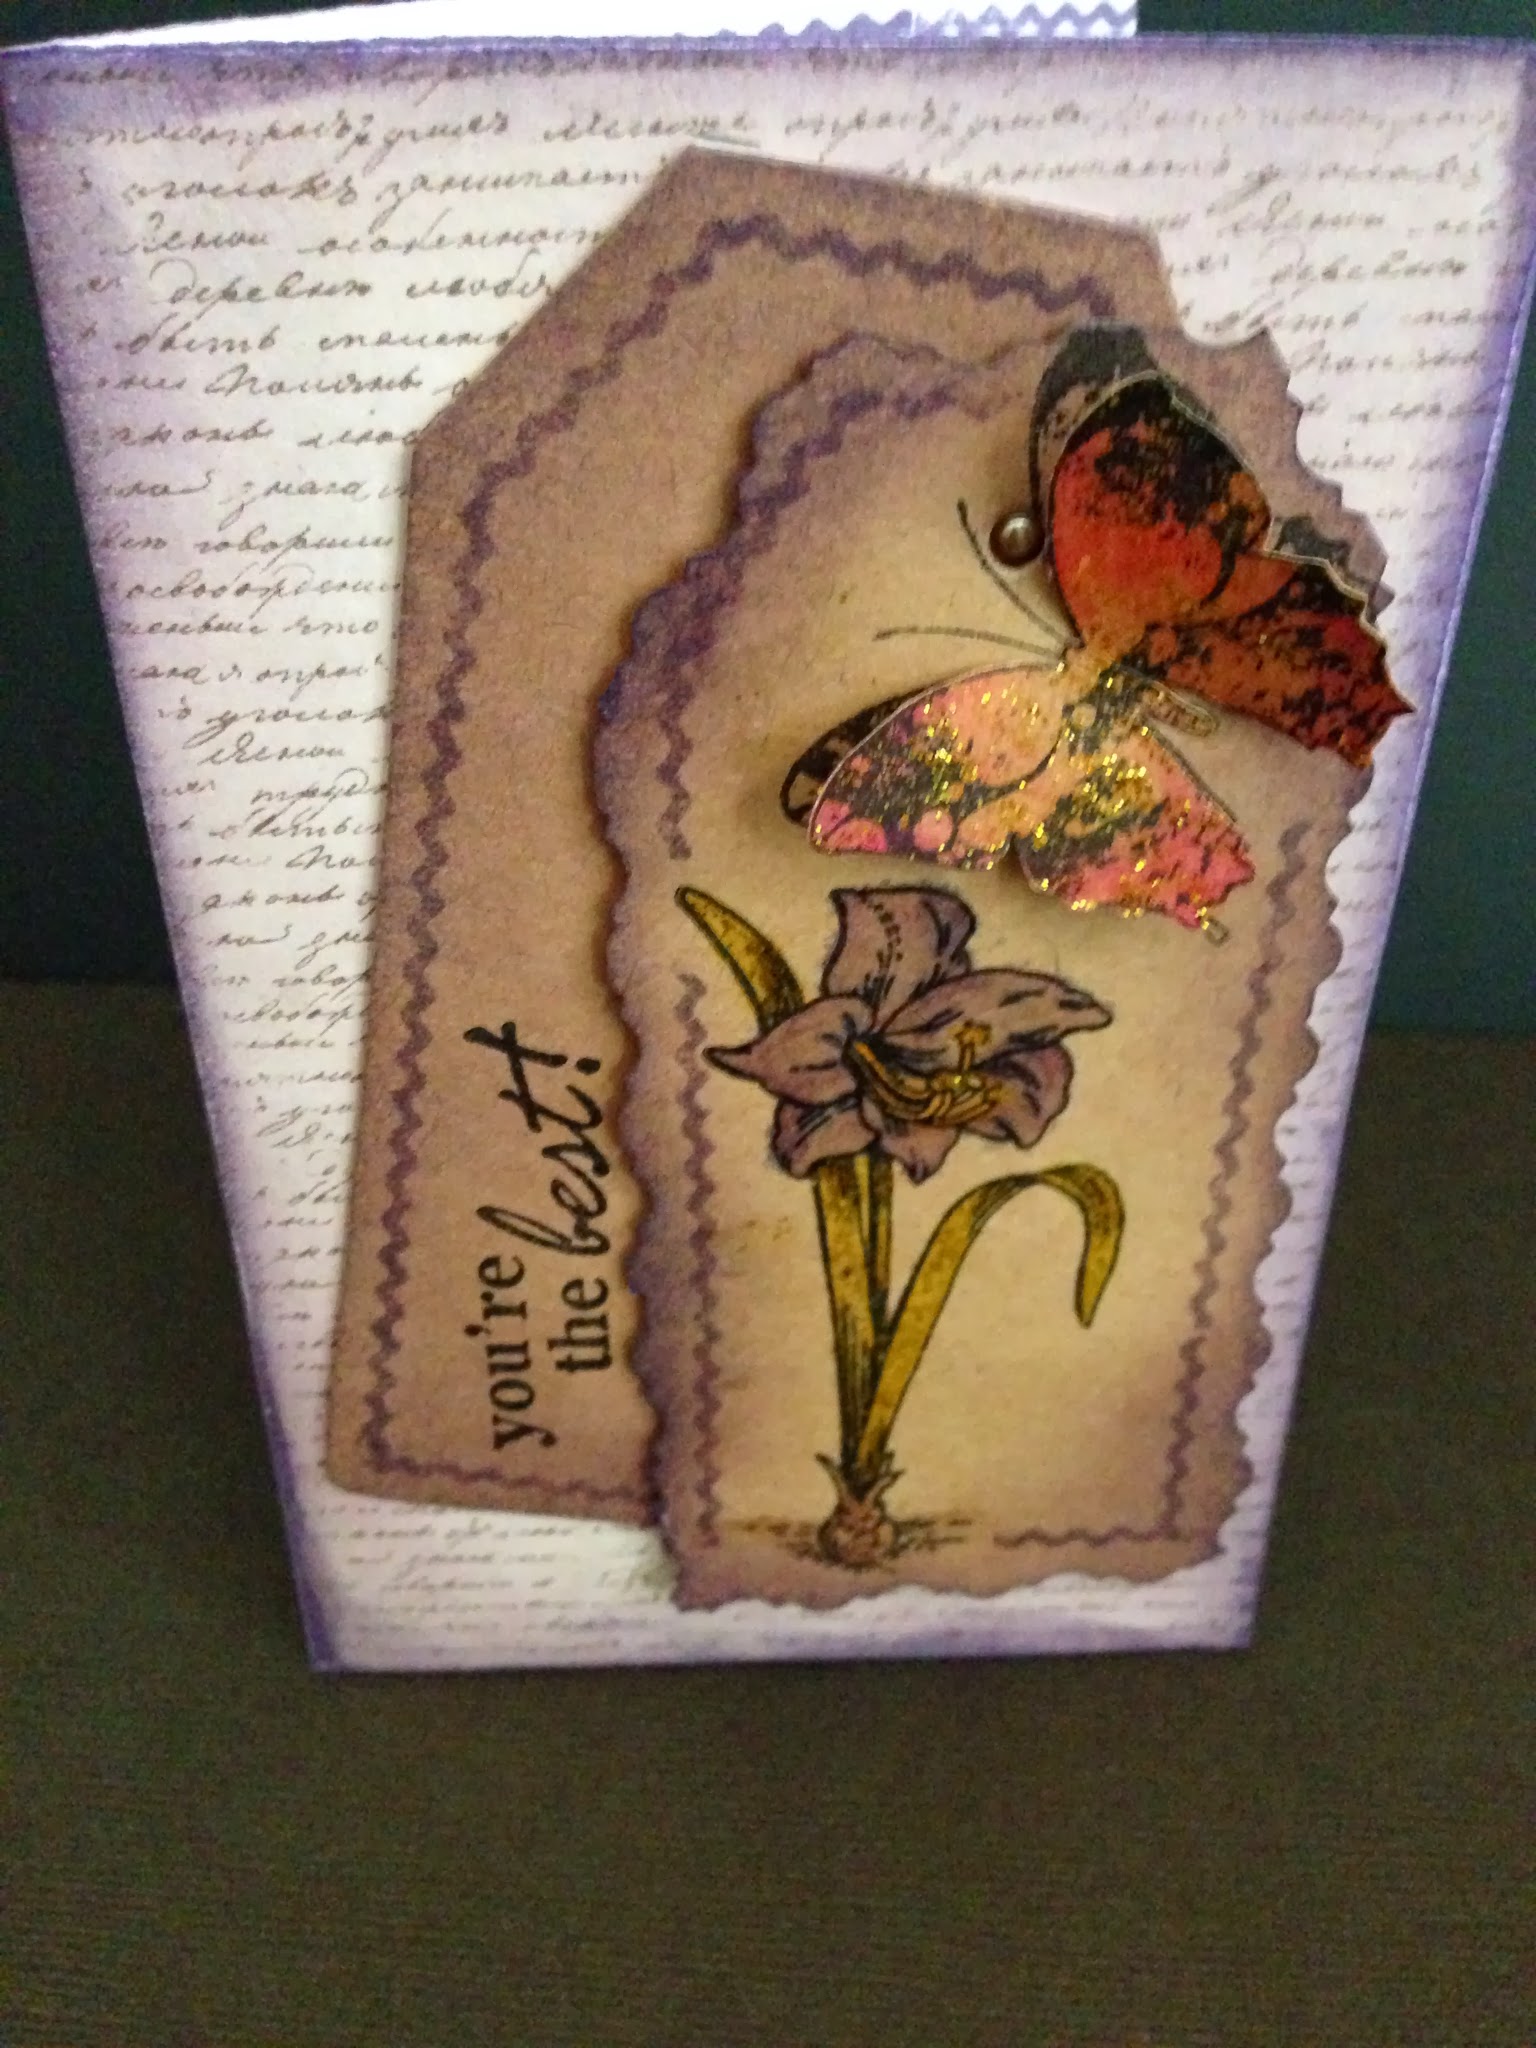
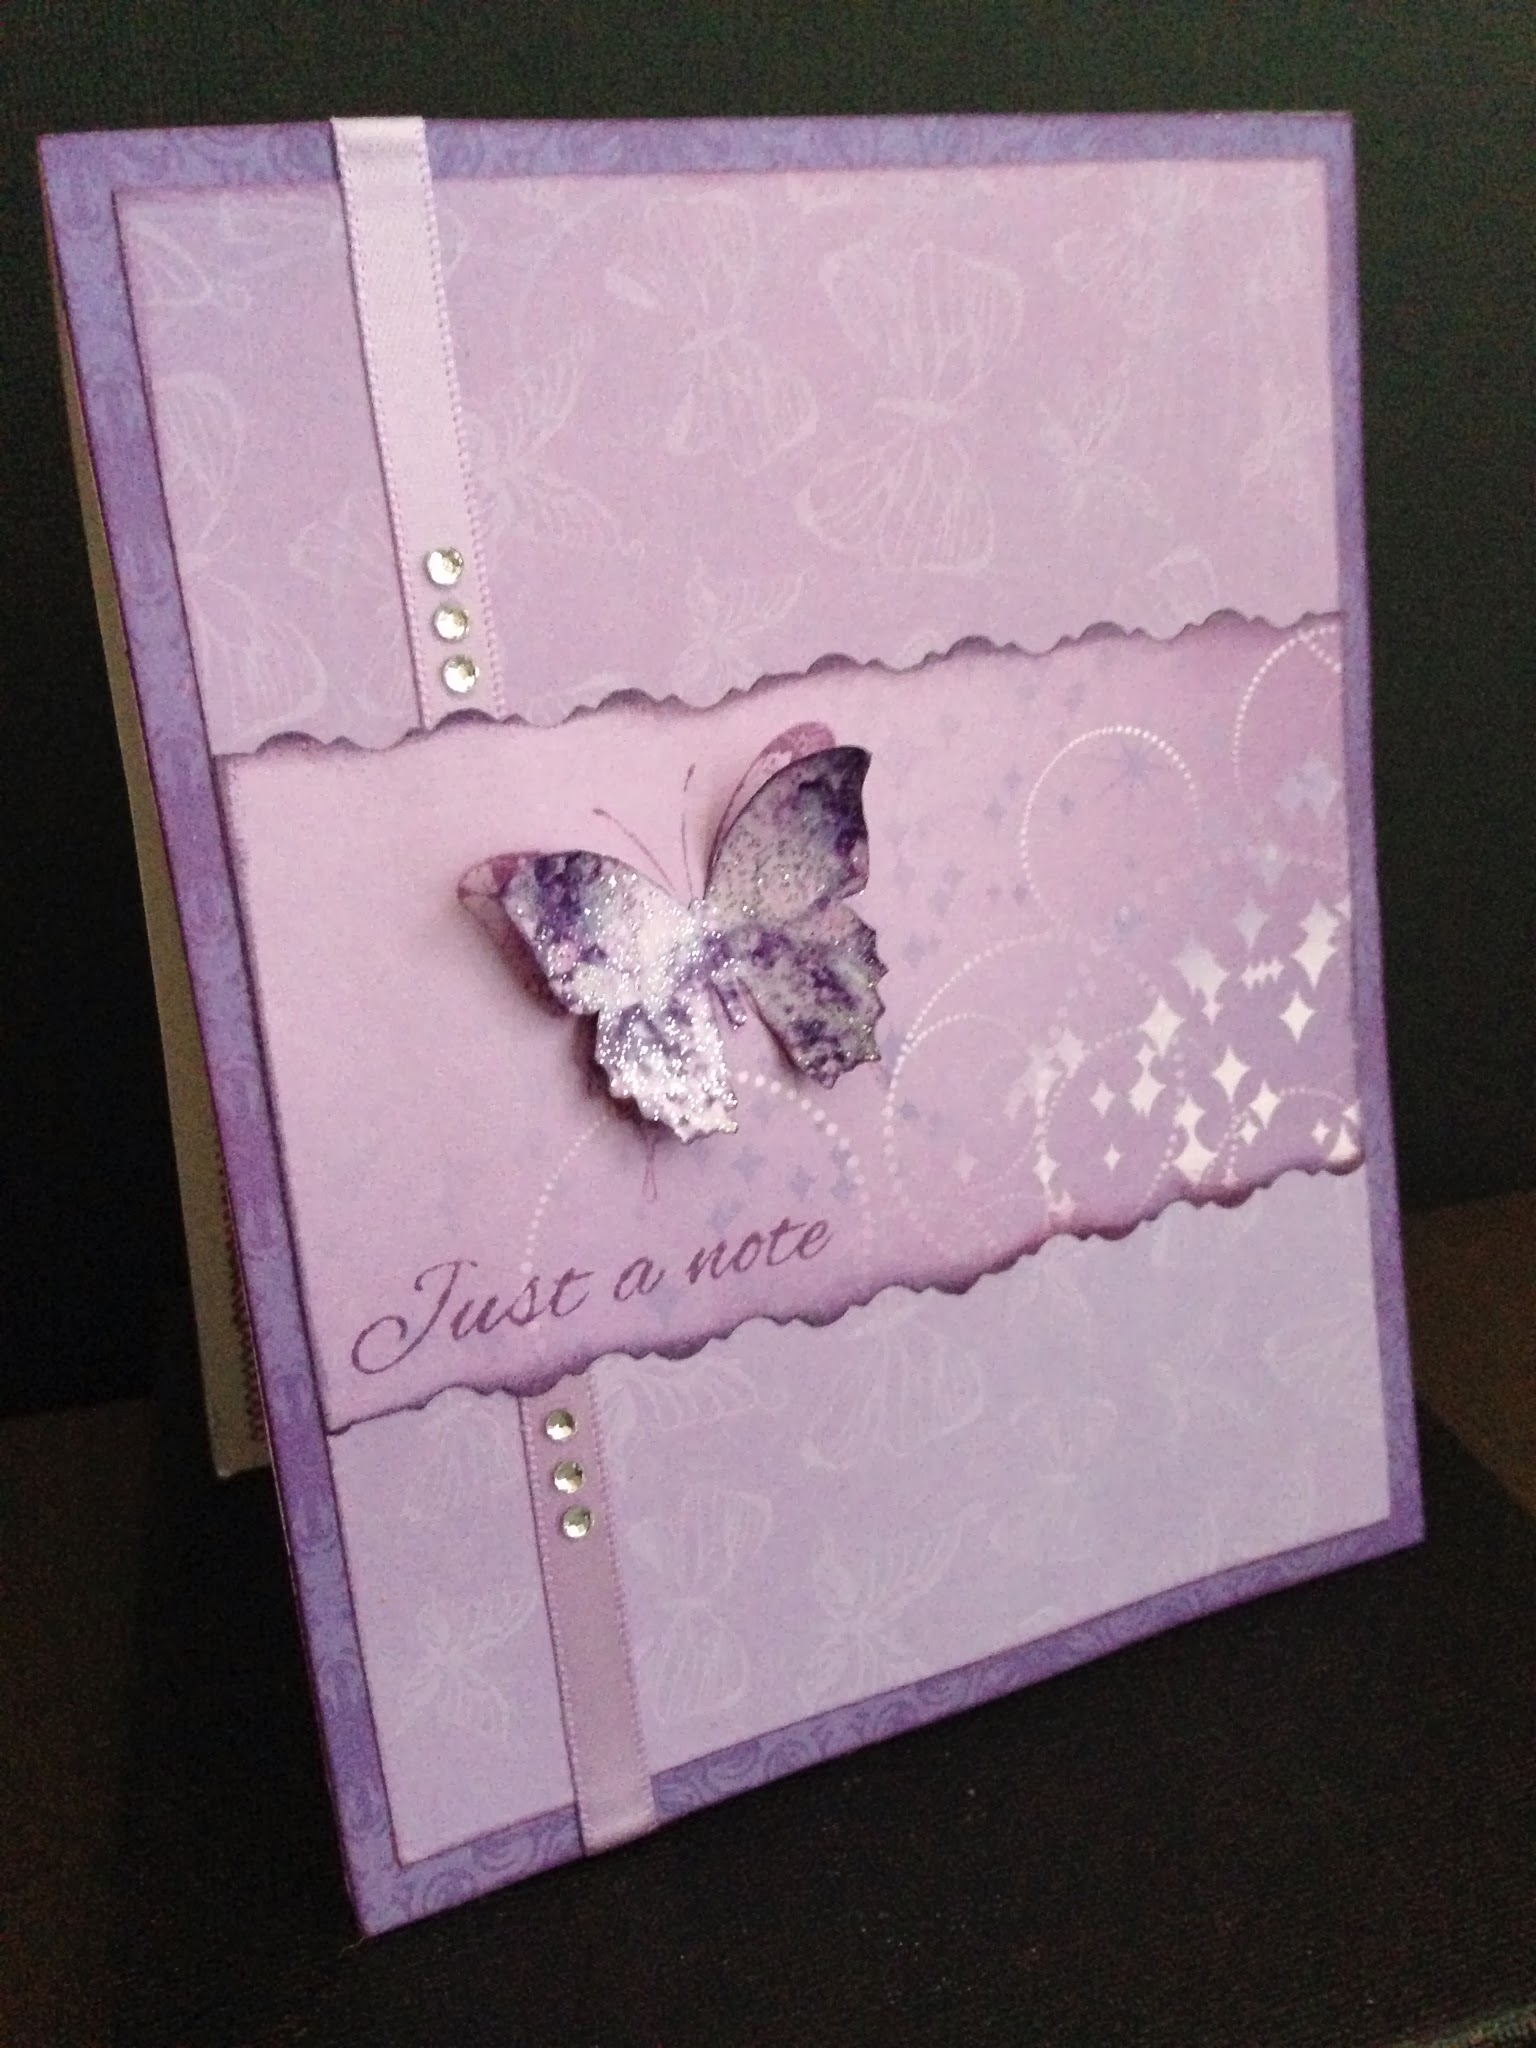
Here is the card. Click pictures for detail.


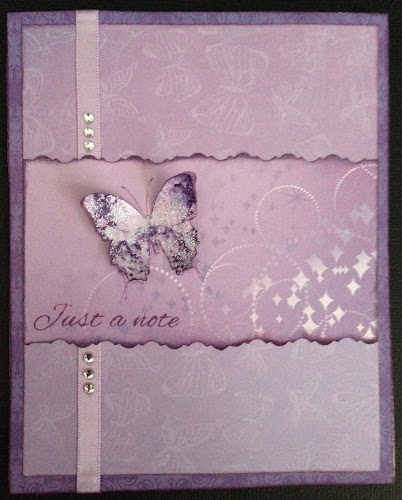
I love how the colours of the design paper co ordinate together and since I am a purple loving person I decided with light purple designs. A simple design really, just some stamping, cutting and gluing, all on a white base card that opens vertically.

I really love this card and so does my hubby who said "This is really beautiful".


I used :

Design Paper :- KaiserCraft (Fairy Tales)

Ribbon :- Favours by Vivaldi

Design scissors :- Victorian cut

Bling :- KaiserCraft (Rhinestones)

Stamps :- STAMPlorations Artiful Flutters (butterfly), Trendy Feathers (sentiment)

Ink :- Distress ink - dusty concord, Memento - sweet plum

and some silver glitter glue for the beautifully dimensional butterfly.


I would like to enter my card in the following challenges.

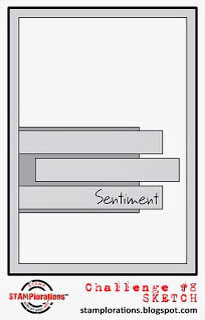
STAMPlorations - Bi-Weekly Sketch Challenge #7

Craftyhazelnut's Patternered Paper Challenege - March

Make it Monday - MIM#181 Anything Goes

Brown Sugar Challenge Blog - #84 Make it Sparkle

613 Avenue Create - Anything Goes

Simply Create Too - challenge #56 Shop in your Stash

Crafting by Design - Anything Goes in March

Stamp and Create - Ready for Spring


I hope you enjoyed my card and see you soon, keep an eye out for my flat canvas design, posting soon.

Cheers MoNika